![]()
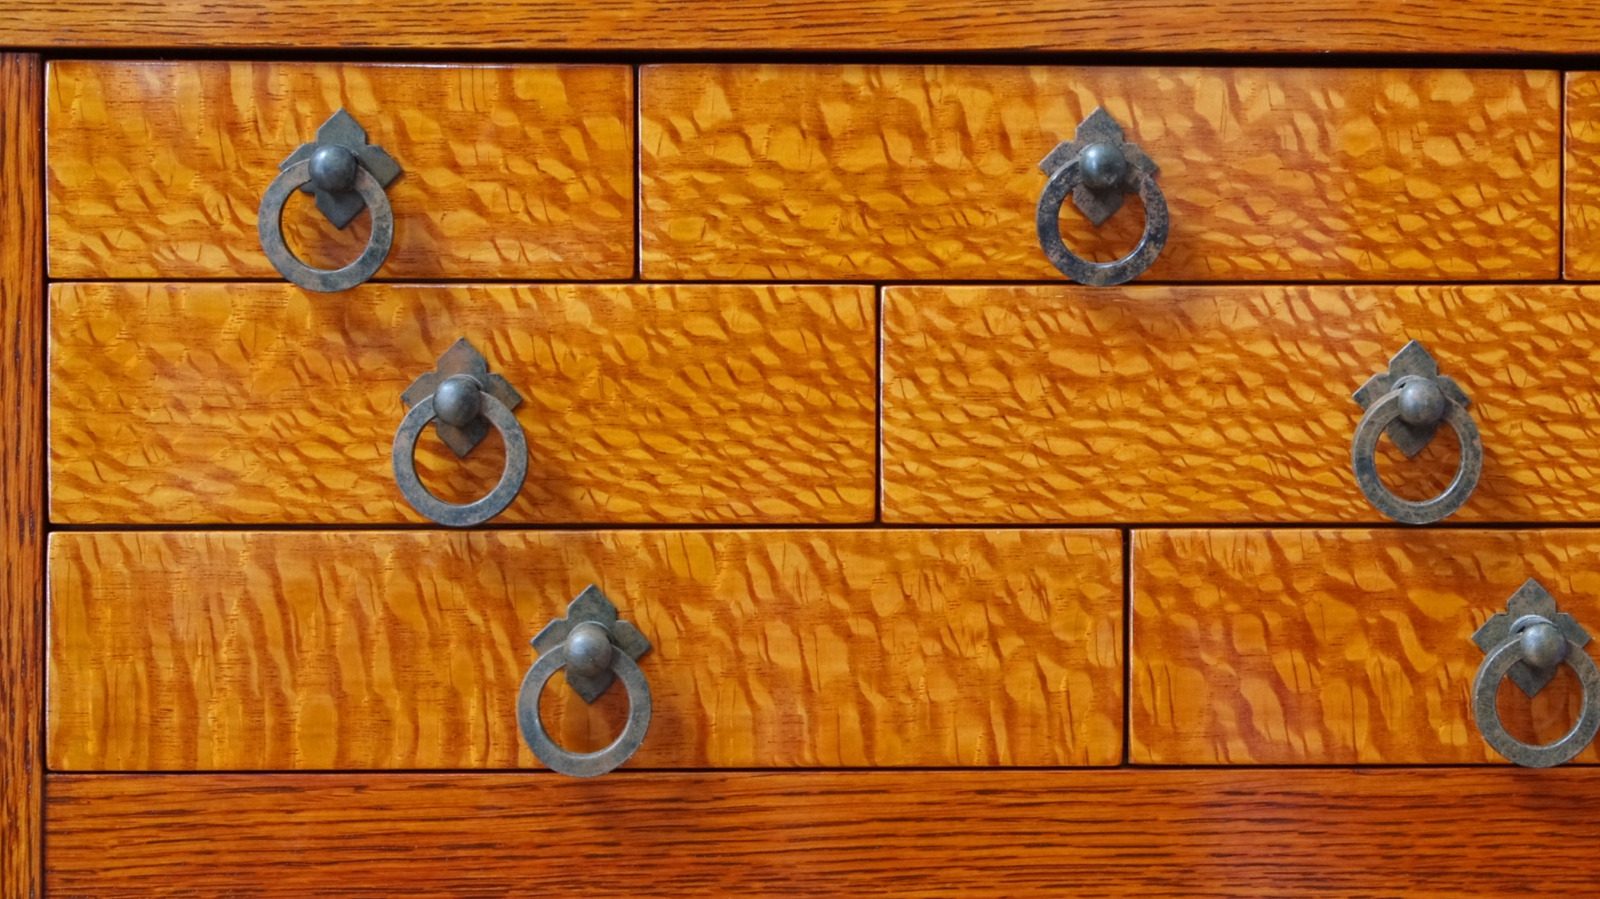
There was a time when nearly every furniture producer used a honey-maple stain on their creations. This trend was widespread, resulting in numerous well-crafted pieces of furniture with a distinct orangey shade. However, honey-toned cabinets and other furniture have fallen out of favor, leaving these pieces somewhat neglected, akin to “orange-headed stepchildren,” if you will.
As a seasoned woodworker with years of experience in finishing and refinishing furniture, I can suggest three methods to eliminate the orange hue. The first method is to paint the furniture directly. Unfortunately, this approach conceals the beautiful wood grain beneath a layer of paint, which I believe detracts from the natural beauty of wood. The second, and perhaps more common, option is to refinish the wood furniture. While effective, this method demands considerable effort: removing the old finish involves chemical strippers, sanding, and elbow grease, followed by applying a new finish, which can be quite messy.
This leads us to the third method, which I’ll detail today: applying a wash-coat of thinned paint to alter the color. Wash-coats are quick to apply and can produce stunning results. They allow the wood grain to remain visible while taking much less time than the other methods. This technique is worthwhile because it offers a straightforward DIY process to “get the orange out” without breaking the bank. It enables you to preserve any high-quality orange furniture that remains excellent in form and function despite its outdated appearance.
How to prepare a piece of orange wood furniture for a wash-coat
The initial step in wash-coating your orange wood furniture is thorough cleaning. A window cleaner spray works well for this, removing oils and dirt. Follow this by sanding the piece – sanding with the grain – using either 120 or 150 grit sandpaper. This step is meant to slightly roughen the surface for better paint adherence. After sanding, wipe the piece with a damp cloth to remove any sanding residue. Address any minor repairs at this stage, such as re-gluing joints or loose trims, and filling dents or cracks with matching wood filler. Sand these repairs smooth.
While this technique is often referred to as a wash-coat, it’s commonly known as whitewashing. White paint is the most popular choice as it brightens the finish and conceals unwanted colors. However, I prefer “wash-coat” because you aren’t limited to white – grays and dark browns are also options, depending on your desired outcome. To counter the orange hue, choose white paint with a blue tint. Blue and orange are opposites on the color wheel, so they neutralize each other. Be cautious not to overdo it, as too much can result in a muddy gray. Test your choice on a small section before committing to the entire piece.
Applying a wash-coat to honey-toned wood furniture is easy, but don’t overlook some key factors
Start by preparing your paint. Thin it with a mixture of two parts water to one part paint, producing an opaque finish while retaining the wood grain visibility. If you’re new to this, consider adding more water for lighter coverage. You can always apply a second coat if needed, as removing dried paint evenly is challenging. You can use either water-based or oil-based paint. Oil paint, thinned with mineral spirits, dries slowly, allowing more time for adjustments. However, it’s smelly, requires paint thinner, and takes longer to dry. I recommend water-based paints, including latex. Thinned with water, they dry quickly, which can make achieving an even coat more challenging.
Use a soft-bristled brush to apply the thinned paint, starting with corners. Ensure the paint isn’t thicker in corner joints than on the rest of the piece. Paint with the grain using long, controlled strokes.
Good lighting is crucial as you work. Without it, you might apply the paint unevenly without realizing. If an area appears too thickly coated, use a dry brush to lift some of the wash-coat. The good news is that wash-coats tend to deliver forgiving results, making them an excellent choice for eliminating orange hues.
Here are some additional wash-coat options for orange wood furniture
Like many finishing techniques, there are alternative wash-coat methods. You can even whitewash raw wood, not just orangey pieces.
Some people apply the paint with a rag, creating an intentionally uneven application for a rustic, antique look. Another option is adding a wash-coat of a slightly different color for depth and contrast. If experimenting with wash-coats, practice on a piece you don’t mind altering, as not all experiments succeed. If you apply a second coat, whether of the same or a contrasting color, use 0000-steel wool to smooth the finish between coats for optimal results.
Finally, apply a clear finish over the completed wash-coat for added protection. I recommend a no-gloss (flat) polyurethane, which provides a durable layer without adding shine. Several brands offer matte finishes. This step is especially important for tabletops, which endure more wear. Regardless of your approach, know that wash-coats are a fun, fast, and easy way to update a worn finish or remove the orange hue.


